
Connecting your custom domain and publishing on Groove.cm has changed AGAIN!
Which means my my custom domains to GroovePages, GrooveMember and GrooveBlog are now out of date because the whole user interface has changed.
So we’re going to go through the whole process again, connect a brand new domain to Groove.cm and link it to GroovePages, GrooveMember and GrooveBlog.
Connect & Publish Your Custom Domain To Groove.cm Tutorial
Timestamps:
- 00:00 – Intro
- 00:50 – Color icons explanation
- 01:05 – Red underline on app = root domain
- 01:16 – No underline on app = sub domain
- 01:20 – Adding new custom domain
- 01:50 – Groove Domain name servers
- 02:07 – Updating name servers at domain registry
- 02:34 – How to update name servers for YOUR domain registry
- 03:06 – Hard refresh browser
- 03:30 – Choose primary app for root domain
- 04:04 – Deleting unnecessary records
- 04:22 – Adding new records
- 04:46 – Publishing domain on GroovePages
- 05:50 – Example of domain sub-directory
- 06:59 – Connecting GrooveMember Domains
- 07:53 – Connecting GrooveBlog Domains
- 08:39 – Technical support for custom domains
Connect your custom domain to Groove.cm (GrooveFunnels):
- Head to the top right corner where the hamburger icon is, click on it
- Select “My Account” and “Domains” tab
- You’ll be given two options, using Groovepages sub-domain or Connecting your own custom domain.
- You want to select “Custom domains” and click on “Manage”

- Now all of my domains that I’ve connected previously (via Cloudflare to Groove) are listed down here.
- Over on the right of your domain, you can see the corresponding apps that you can connect to your domain (with more apps coming soon)
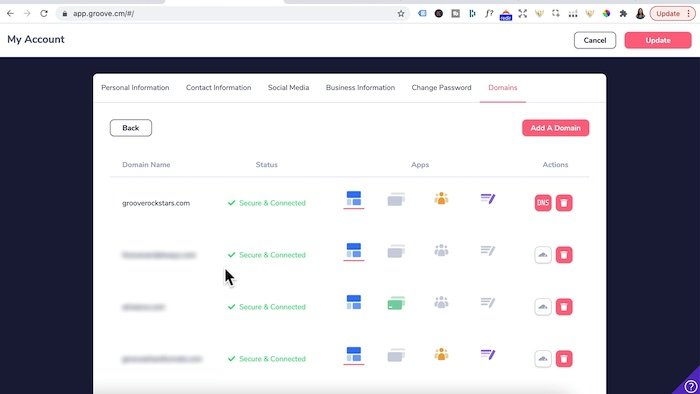
Very quickly, let me explain how this works:
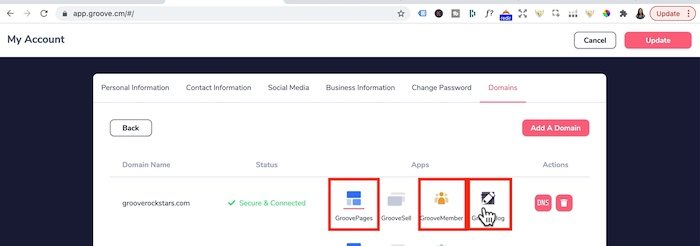
- If an app is connected to your domain, it will be activated with a color…
- If it’s greyed out, then that app isn’t connected to your domain yet.
- If you see a red line underneath an app – this is the main app or hero app connected to your root domain
- In this example, I’m using GroovePages which is the main app I want connected to my root domain.
- If there is no underline, but it’s activated with a color – that means that this app is connected to a subdomain of your domain.
Adding a brand new domain and connecting it to GroovePages
The reason why you want to connect it to GroovePages first is because logically you want to build your website or funnels on the root domain.
However if you only wish to build a blog on your root domain, then select GrooveBlog as your root domain and hero app.
- Click on the “Add a domain” button
- Step 1: What kind of domain do you want to add?
- We’re going to select “full domain setup” ( as it’s recommended for brand new or unused domains)
- Click next
- Enter in your domain name here – so that’s yourdomainname.com and click next.
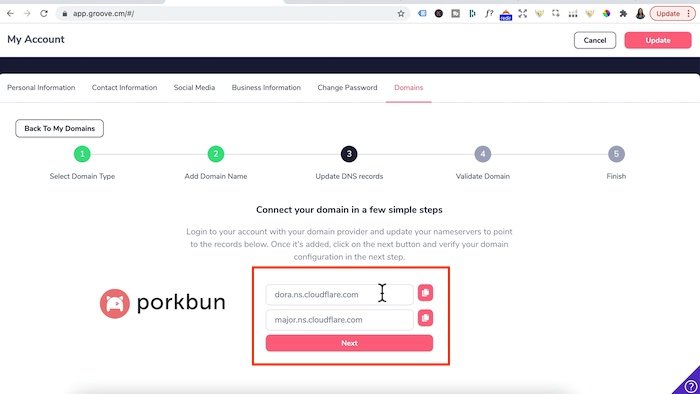
- You’re going to be given Groove’s domain name servers here (which is outlined with a red box below)
- Groove has given you instructions on how to add these name servers to your domain registry.
- I purchase my domains at Porkbun, yours could be namecheap, godaddy etc.
Lets login to Porkbun since that’s my domain provider, I click on details :
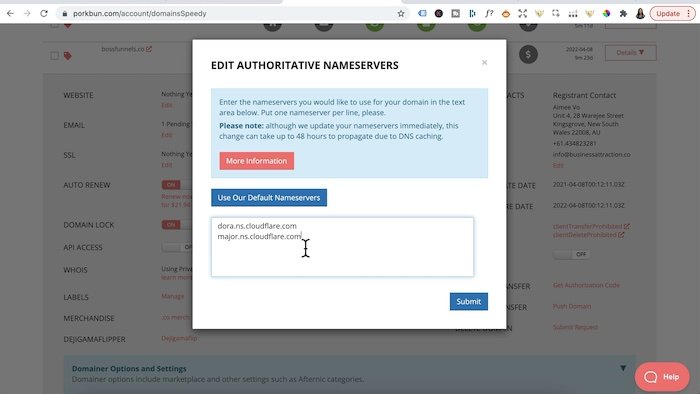
- The section I want to edit is AUTHORITATIVE NAMESERVERS
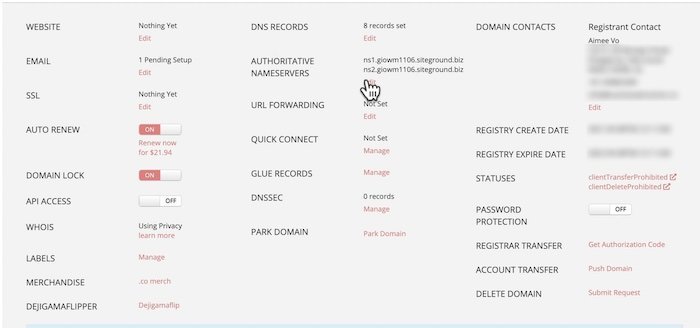
- This is where you want to replace with Groove’s domain name servers so I’m going to click on “edit”.
- You want to head back to Groove, copy these name servers and paste it back into the name servers section in Porkbun or your domain name registry.
- Each Groove name server is to be added on a separate line and press submit.
If your domain is with namecheap:
- You would login to Namecheap.
- click on “Domain’s list” and “manage”
- Click on the domains tab up top, head down to name servers and select “Custom DNS”
- This section is where you want to enter in Groove’s domain server here – domain server 1 & domain server 2
- Once you’re done click on the check icon
TIP: If you bought your domains at a place like Godaddy or any registry for example, all you need to do is just google “update nameservers on Godaddy” and you’ll see the instructions on how to do this for your specific domain registry.
- Lets head back to grooves and click NEXT
- Click on “Validate DNS records”
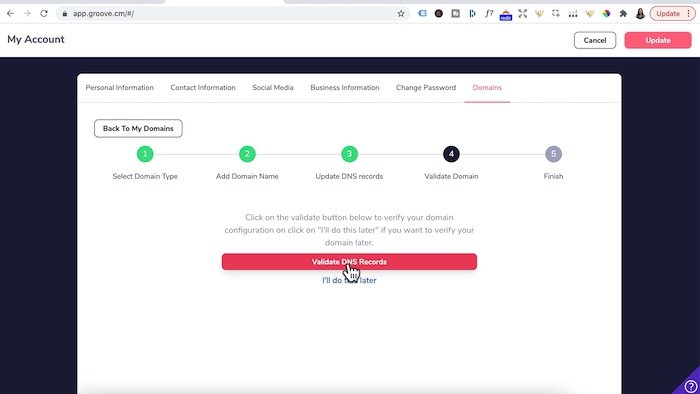
- You will need to validate your domain before you can select the groove app you want it associated to.
- Once you validated your domain, there will be a yellow alert that tells you to check back in one hour.
- After 1 hour, refresh browser again and head back to the “domains tab”
- There will be a pink button that you will need to “Click to verify domain”
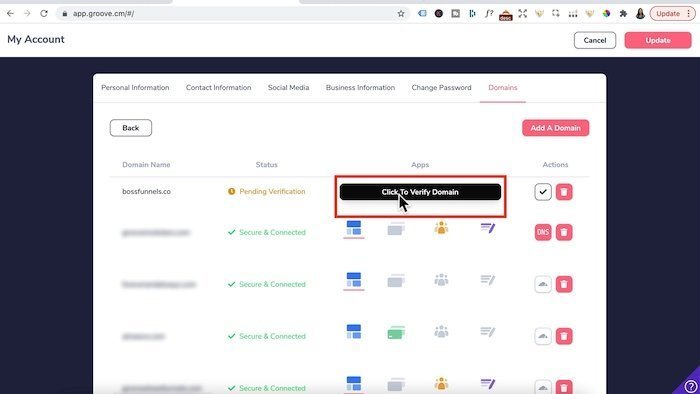
- It will prompt you to add name servers and validate your DNS records again as per below:
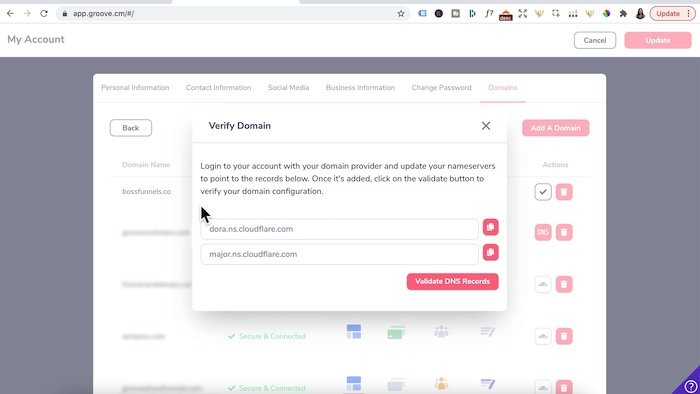
- Now you can choose the primary app that you would like to be connected to your root domain.
- Click on “Choose Primary App for this domain” – and if you click on the drop down arrow, you can make your root domain to any of these apps.
- You can have your root domain, on GrooveSell, GrooveMember, GrooveBlog – but I would NOT select any of these apps and choose GroovePages because you want to build out your webpages and funnels on your root domain using GroovePages.
- Click on the pink check button
- You’re done and should see a red line under GroovePages app – that is the hero app that is connected to the root domain.
- Click on the check icon again
- and you will be redirected to the DNS records ok
- Now this is important, domain registry RECORDs that is pointing your root domain to something else that’s not grooves name servers, you would delete it using the bin icon here.
- I’m not going to cover adding records like c names, TXT or MX records here but later on if your setting something up that requires you to add a record, you will click on this DNS button to add it.
OK Now that we have selected GroovePages as the main app:
- you can see groovepages icon has an active color and a red line underneath it which is the hero app.
- Click on Update
Publishing Domain on GroovePages
- Open up a GroovePages website and head up to “publish”, click on it.
- Under hosting options:
- select “custom domain”
- Select the domain you just aded
- Select “Root domain”
- Under “publish”, hover over the website button
- Click on the cloud icon to publish the whole site
- Give it a few minutes to go live.
- To obtain your Domain URL:
- Hover over the website button again
- Click on this link icon in the middle – it should copy the URL
- Open a new browser, paste in that URL
Your domain is now published and live.
Create Stunning Funnels That Sell Like Crazy?
After you connected and published your domain, it’s time to start building out your landing pages and sales funnels on GroovePages.
If you want to create stunning funnels that sell like crazy, I recommend writing great copy with relevant CUSTOM graphics.
In this day and age, people don’t read long blocks of copy.
They’re skimming and only stop scrolling when they see a compelling image.
You NEED unique custom 3d mockups, book covers, lead magnet images, online course mockups and funnel graphics to make your sales page convert.
I’ve always struggled with design and could not justify hiring expensive graphic designers.
Not anymore.
The banner below was created WITHOUT any design skills and under 60 seconds.
Just point-and-click, drag-and-drop, then export!
Click the banner to learn how you can create stunning 3D digital product mockups and sales funnel graphics without any design skills.

Connect GrooveMember as a Sub-domain:
- Go back to the domains tab again
- Click “Custom domains” > “Manage”
- Using the same domain, you’ll click on the GrooveMember app icon
- Under Actions > click on the + button
- Add a subdomain name like “Members”
- Click on the check button and it’s now added
- Head back up top and click on update
- Now you’re going to head to the Groovemember app > Content > Memberships
- Select the membership you want to add the sub-domain to.
- Head to “Actions” > settings
- Under custom domain: select the root domain
- Under subdomain, select members. your domain.com
- Click “Update Settings”.
The same process applies to connecting GrooveBlog to your custom domain.
Connect GrooveBlog as a Sub-domain:
- Go back to the domains tab again
- Click “Custom domains” > “Manage”
- Using the same domain, you’ll click on the GrooveBlog app icon
- Under actions > click on the + button
- Your subdomain name would be something like “blog”
- Click on this check button and it’s now added
- Now head to the Grooveblog app > select your GrooveBlog to open
- Click on “Settings” > “Domains” tab
- Under custom domain: select the root domain
- Under subdomain, select the subdomain name “blog” you just created
- Click SAVE.
Ok we’re done.
If you’re still experiencing technical issues with your name servers, reach out to groove support by going to GrooveDigital Support and creating a ticket.
I do not offer any technical or Groove support.